Knowing how to secure a laptop before a sensitive interview takes about fifteen minutes once you know the seven checks: verify who invited you, install updates, turn on full-disk encryption, lock down sign-in and second factors, clear everything visible on screen, confirm what is syncing where, then test the network and the handoff. Most interview compromises come through one of three doors — a malicious meeting link, a stranger reading your screen, or a lost or seized machine — and each one has a different fix.
This is written for journalists sitting down with a confidential source, whistleblowers handing over documents, researchers with embargoed material, and anyone meeting a stranger to talk about something they would not want read over their shoulder. If you only do three things, do the first three: check the invitation, update the operating system, and confirm encryption is actually switched on rather than merely installed.
Menus and setting names below are for Windows 11 and current macOS. They are close enough on Windows 10 that the difference is called out where it matters. Times are realistic: the fast pass is fifteen minutes if encryption is already on and your backup is current. The first time you enable FileVault or BitLocker, allow an hour because the drive has to be encrypted from scratch.
Table of Contents
- What You Need
- How to Secure a Laptop Before a Sensitive Interview: Pre-Interview Checklist
- Step-by-Step
- 1. Assess what the interview puts on the laptop
- 2. Install updates and restart
- 3. Turn on full-disk encryption
- 4. Secure sign-in and application access
- 5. Clean the visible surface before you secure a laptop for the interview
- 6. Check storage, sync and metadata
- 7. Test the network, update the backup and close out the handoff
- Common Mistakes
- Frequently Asked Questions
- Can I use an employer-owned laptop for a sensitive interview?
- Should I bring my laptop offline for a confidential interview?
- Is it safe to record a sensitive interview on an encrypted laptop?
- How do I protect notes and recordings on cloud storage?
- What should I do if my laptop is stolen after the interview?
- How can I prevent others from seeing my laptop screen in public?
- Conclusion: Lock It Down Before You Leave
What You Need
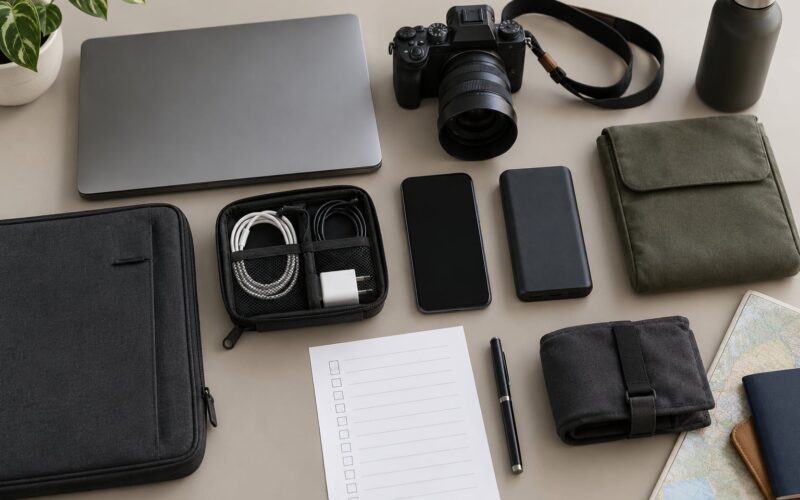
You need the laptop you actually plan to carry, the charger, and about fifteen minutes you are not going to interrupt. Everything else is a setting rather than a purchase, which is good, because hunting for gear the night before a sensitive meeting is its own risk.
- The right device. Employer-managed equipment is governed by your newsroom’s IT policy and may be remotely monitored. Decide before you start whether it is appropriate for this conversation, and follow policy if it is.
- A current operating system. Check that you are on a supported release with pending updates finished, not merely downloaded.
- A strong, unique login password stored in a password manager rather than typed from memory each time.
- A second authentication method — an authenticator app or a hardware security key for email and cloud accounts, not just SMS.
- An encrypted backup destination separate from the laptop, so losing the device does not mean losing the material.
- An approved VPN, plus a phone number for a hotspot as the fallback when the VPN will not connect.
- An offline contact and recovery plan: one phone number on paper, and somewhere outside the laptop that holds your encryption recovery key.
If you are handling material tied to a named confidential source, add a dedicated user account or a separate machine to that list. The account is free and takes five minutes. The machine is a real decision and belongs to your outlet’s security lead, not to you alone.
How to Secure a Laptop Before a Sensitive Interview: Pre-Interview Checklist
Run this list in order the morning of, or the hour before if you must. It is designed to be done once and reused for every interview, because a routine you have run before is worth more than a perfect routine you have never tried.
| Step | Time | Windows 11 | macOS |
|---|---|---|---|
| Verify sender, domain and calendar invite | 2 min | Check the address bar, read the sender domain backwards | Same check; hover the link to preview the URL |
| Install all pending updates | 5 min | Settings > Windows Update > Check for updates | System Settings > General > Software Update |
| Run a scan | 5 min | Windows Security > Virus & threat protection > Scan options > Full scan | Turn on XProtect and monthly malware scans in System Settings > General > Login Items |
| Confirm encryption is on | 1 min | Settings > Privacy & security > Device encryption | System Settings > Privacy & Security > FileVault |
| Set auto-lock and screen lock | 1 min | Settings > Accounts > Sign-in options; lock after 1 minute | System Settings > Lock Screen > Turn display off on power adapter when inactive |
| Silence notification previews | 1 min | Settings > System > Notifications > clear each app toggle | System Settings > Notifications > turn off previews per app |
| Close unrelated tabs, apps and files | 3 min | Clear Jump Lists in Settings > Personalization > Taskbar | System Settings > Desktop & Dock > Clear List and Recent Documents |
| Connect to the right network | 1 min | Settings > Network & internet > Wi-Fi; forget unknown networks | System Settings > Wi-Fi; turn off auto-join |
| Update the encrypted backup | 5 min | Confirm the sync completed before you close the lid | Same — check iCloud or your approved encrypted drive |
Read that table once now and note the two paths you will actually use. Paths move between releases, and a man with fifteen minutes to spare is exactly the person who cannot find a setting under pressure.
Step-by-Step
1. Assess what the interview puts on the laptop
Write down, in one line, what will be on this machine: notes, audio, documents, photographs, cloud links, or nothing at all. That single line decides the rest of your preparation and stops you hardening settings that do not matter while skipping the ones that do.
Interview compromises cluster into three paths, and each needs a different control:
| Threat | What it looks like | Control that blocks it |
|---|---|---|
| Malicious invitation | A meeting link or “update” that installs remote-access software | Domain verification, refusing unexpected installs, updates |
| Eyes on the screen | Shoulder-surfing in a cafe, a roommate, a second monitor on video | Privacy filter, cleared surface, notification previews off |
| Device lost or seized | Smash-and-grab in a taxi, hotel room, border crossing | Full-disk encryption, short auto-lock, device tracking, remote wipe |
Confirm whether the laptop is yours or your employer’s. An employer-managed device may carry remote monitoring and management that logs activity, and that changes what is appropriate to open on it during a confidential conversation. If you are unsure, ask your IT or security contact rather than guessing.
Finally, check the device is not already compromised. Rebooting on its own, unexpected remote-access software in your app list, a security pop-up demanding payment, or a camera light that comes on unprompted all deserve a full scan and a call to your security contact before the interview, not after. In a documented case reported in January 2026, a fake job interview link on a look-alike Zoom domain delivered a trojanized installer that installed remote-access agents at system level, dumped browser-stored passwords, and hijacked the victim’s professional account to recruit further victims. The people around the victim spotted the tell in a message timestamped 03:12 in the morning, with a bare link and no calendar invitation.
2. Install updates and restart
On Windows 11, open Settings, then Windows Update, then Check for updates. Install everything offered, including optional security updates, then restart. On current macOS, open System Settings, then General, then Software Update and install. Restart and confirm the machine did not hand you a “restart required” banner on the next login, because a partially patched machine is not a patched machine.
Verify it worked by checking the update history rather than trusting the absence of a notification. Restarting matters on its own: the majority of malware riding in through browsers and documents stops executing after a clean restart, and several updates only finish installing across one.
3. Turn on full-disk encryption
On Windows 11 with a Pro or higher edition, go to Settings, Privacy & security, Device encryption and switch it on. On Windows Home, search for “BitLocker” in the Start menu and use the built-in BitLocker setup instead. On a Mac, open System Settings, Privacy & Security, FileVault, then Turn On FileVault.
Store the recovery key somewhere that is not the laptop: a printed copy in a locked drawer, a password-manager entry reached from a different device, or an offline drive. If you need the key and only have the laptop, the encryption protects nothing.
Verify it worked in three ways: the setting panel says encryption is on, the drive shows as encrypted in your file manager or Disk Management, and the machine still unlocks normally after a restart. Confirm that last one before you leave the building, because a machine that will not unlock after a firmware update is a machine that costs you an interview.
Know what you have bought. Full-disk encryption protects data at rest: a stolen drive, a confiscated laptop or a drive pulled from a broken machine yields unreadable data without the key.
| Protects against | Does not protect against |
|---|---|
| A stolen or seized device powered off or locked | A malicious link you clicked yourself |
| A drive removed and read on another machine | Someone watching the screen or the camera in a live session |
| Recovery from a lost key or a dead machine | A key written on a sticky note beside the laptop |
| Data at rest in cloud-synced local copies | Any file already uploaded unencrypted to a third-party service |
Encryption does nothing about a machine that is unlocked and open in front of someone. That is what the rest of this guide is for.
4. Secure sign-in and application access
Set a long, unique login password with no names, dates or pets in it, generated by your password manager. On Windows, go to Settings, Accounts, Sign-in options to add Windows Hello or a PIN and to set the screen to lock after one minute of inactivity. On macOS, open System Settings, Privacy & Security, then Lock Screen to set the display to sleep after a short idle period on power.
Biometrics are a genuine convenience here, but the legal picture is unsettled, with conflicting US court rulings on whether a fingerprint or face can be compelled. If the conversation could plausibly end in police contact, a password that no one can compel from your finger is the safer default. Turn on Windows Dynamic Lock or a macOS equivalent so the machine locks itself when your phone goes out of range.
For email, cloud storage and the meeting platform itself, enable multi-factor authentication with an authenticator app or a hardware security key. Turn off SMS as a fallback method where the service allows it, since phone numbers can be ported and SIM-swapped.
Audit app permissions while you are in the settings. On Windows 11, Settings, Privacy & security, Camera and Microphone show every app that can reach them; on macOS, System Settings, Privacy & Security, then Camera and Microphone, then App Management for everything else. Revoke anything you do not recognise, and revoke location for apps that have no business knowing where an interview happens.
5. Clean the visible surface before you secure a laptop for the interview
Whatever else you do, clear what is on screen. A stranger in a cafe can read your screen without you noticing, and a video interview shows far more than you intend — the tab bar, the dock, the notification tray and whatever second monitor is attached all read aloud in the background.
Close every browser tab you do not need and open only the meeting in a window sized for the call. Then clear the traces that sit behind it: on Windows, go to Settings, Personalization, Taskbar and use Clear jump lists, or right-click a pinned icon and clear the recent list. On macOS, System Settings, Desktop & Dock, then Clear List. Empty the Downloads folder of anything unrelated and check the taskbar for pinned shortcuts to sensitive projects.
Kill the notifications. On Windows, Settings, System, Notifications lets you switch off previews per app; on macOS, System Settings, Notifications has a Preview setting per app. A message preview that flashes a source name across a video call is the whole failure in one frame. If you rely on a second screen while taking notes, close it or point the display away from the camera before the call starts — interviewers notice a second screen and ask about it, which is its own distraction.
Sign out of accounts that have nothing to do with the interview. A clean, separate user account for interview work, or a dedicated browser profile, takes five minutes and gives you a nearly empty screen by default. You can also change the wallpaper to something neutral and keep the desktop empty of files with revealing names.
Do not delete source material to tidy up. Use a dedicated folder for the interview, move unrelated records elsewhere, and leave anything you may need for legal, editorial or source-protection reasons exactly where it is.
6. Check storage, sync and metadata
Know where your files actually live. Open OneDrive, Google Drive, Dropbox or iCloud and confirm the folder holding the interview material is syncing, that you know which devices it reached, and that nothing important is still queued. Check email attachments for anything sensitive sitting in a drafts folder or an old thread.
Then check what the files carry. Document properties list author, organisation and last-saved-by; Windows thumbnails and macOS preview caches retain images from files you have already deleted. You can clear identifying metadata, but only where your editorial and legal obligations allow it, and never from the archival copy of anything you may have to produce.
For the interview folder itself, use the encrypted storage your outlet has approved, or a VeraCrypt or similar container if there is no policy and you have been trained on it. Tools you have not used before on the night before a source meeting are a liability, not a protection.
7. Test the network, update the backup and close out the handoff
On the day, use your own hotspot or a network you trust and have used before. If you must use public Wi-Fi, connect the VPN before opening anything else, and remember a VPN hides traffic from the network, not from the services on the other end. Lock your screen before you swipe through a boarding pass. Do not lend the device to anyone, including a friend who needs it for their own interview — that request has preceded real compromise attempts.
Update the encrypted backup and confirm it finished. Then run the five-minute close: lock the screen, open it again, scan the visible surface once more, check that notifications are still silenced, confirm the meeting link is the one you verified, and put the laptop in an opaque sleeve rather than a clear one.
Afterwards, do not simply close the lid and walk on. Sign out of the meeting platform and any shared session, remove downloads you did not need, clear the jump lists again, and revoke the screen-sharing permission if you granted one. If the device goes missing, use Find My on macOS or Find My Device on Windows to mark it lost, which locks it and starts a remote wipe — only useful if you enabled device tracking beforehand.
Common Mistakes
Relying on the password alone. A password protects the login, not the unlocked session. Fix: turn on full-disk encryption, set auto-lock to one minute, and add multi-factor authentication to email and cloud accounts.
Charging from a public USB port. Unknown ports can hand out more than power. Fix: carry your own wall adapter, and if you must use the airport or hotel port, use a data-blocking adapter or a charge-only cable.
Forgetting that cloud sync is a copy. A file removed from the laptop may still sit in the sync provider’s servers. Fix: before the interview, open the provider and confirm what the folder contains and who else can see it.
Leaving notification previews on. The single most common leak on a video call. Fix: switch previews off per app, not globally — global off costs you the reminders you need to actually catch the meeting.
Storing the recovery key on the laptop. Encryption with the key in the same bag as the disk is theatre. Fix: print it or keep it in a password manager you reach from a second device.
Deleting too much. Wiping aggressively can destroy material you are legally required to retain, or evidence of an interaction you may need to document. Fix: separate into a dedicated folder rather than delete, and confirm with your editor or lawyer before removing anything.
Clicking the link to get it over with. Install nothing a stranger asked for during an interview exchange, and confirm any legitimate request through a channel you already trust. If someone insists you download a specific tool, that insistence is the finding.
A few field habits carry further than any setting. In a hotel room, keep the laptop with you or locked in the safe, and never leave it in the room while you go out. In an airport, use a plain sleeve and a table against a wall rather than a seat with foot traffic behind it. In a shared workspace, use a privacy filter and sit with your back to a wall. When handing a device to someone else — a technician, a colleague, a source who wants to check a document — sign out of everything first, and hand over a device you can afford to lose.
Frequently Asked Questions
Can I use an employer-owned laptop for a sensitive interview?
Only if your newsroom or employer’s policy allows it, and only if your security lead knows what is being discussed. Managed devices may carry remote monitoring, disk encryption controlled centrally, or logging that exposes source material to your employer and potentially to a legal request. Ask before the interview, not during. If the answer is no or unclear, use a personal device under your own policy, or arrange a second device for interview work.
Should I bring my laptop offline for a confidential interview?
For an in-person meeting, yes is usually right — airplane mode removes a whole category of risk before you arrive. For a remote interview you need the connection, so prepare differently: verify the link in advance, use a hotspot or trusted network, connect your VPN before opening anything, and keep updates and multi-factor authentication active. Offline mode does not protect you from a malicious meeting application, so install nothing new on the day.
Is it safe to record a sensitive interview on an encrypted laptop?
Recording on an encrypted laptop is reasonably safe for the file at rest, provided you consent, and provided the consent is recorded or documented where your jurisdiction requires it. The bigger risks are not technical: an unscheduled recording in some jurisdictions without consent is unlawful, a cloud transcription service uploads audio off your device, and backup software may copy recordings to a provider your source has not agreed to. Record locally, upload later under an agreement that covers storage.
How do I protect notes and recordings on cloud storage?
Use an encrypted storage account with multi-factor authentication and a hardware key where offered, keep interview material in one dedicated folder rather than scattered across drives, and confirm which devices the folder has synced to. Disable automatic sharing links for that folder. If your outlet has an approved encrypted service or a SecureDrop-style submission system, use it instead of a general consumer account, and never share a provider login with anyone outside the reporting team.
What should I do if my laptop is stolen after the interview?
Report it to your employer or security lead and to the police, then act fast. Use Find My on macOS or Find My Device on Windows to mark the device lost, which locks it remotely and can start a wipe. From a different device, change the password for every account that was signed in and revoke active sessions, then rotate credentials stored in that browser. Full-disk encryption means the disk itself is unreadable without your key, but anything already uploaded to the cloud is exposed. Tell affected sources if their material was on it.
How can I prevent others from seeing my laptop screen in public?
Turn the display brightness down and angle it away from walkways, then add the hardware that actually works: a privacy filter, which blocks side-angle viewing, and a plain or opaque sleeve for when you are not using the machine. In shared workspaces, sit with your back to a wall and screen off when you step away. On video calls, close unrelated windows and put paper notes face down. No software setting reliably prevents a determined neighbour from reading over your shoulder.
Conclusion: Lock It Down Before You Leave
Update the operating system, turn on full-disk encryption, and store the recovery key somewhere that is not the laptop. Do those three the night before, not in the taxi. Then, in the fifteen minutes before the interview, verify the invitation, silence notification previews, clear the visible surface, confirm what is syncing, and lock the screen one last time. Fifteen minutes, every time, beats a perfect setup you only did once.